Wireguard on Google Cloud
Server side
Install wireguard client
sudo apt update
sudo apt install wireguard
sudo apt install ufw
sudo apt install iptables
Generate private/pulic key
Private key
wg genkey | sudo tee /etc/wireguard/private.key
sudo chmod go= /etc/wireguard/private.key
Public key
sudo cat /etc/wireguard/private.key | wg pubkey | sudo tee /etc/wireguard/public.keyCreate Wireguard config file
sudo nano /etc/wireguard/wg0.confadd tihs inside (setup the client for get client public key)
[Interface]
Address = 192.168.10.1/24
DNS = 8.8.8.8
DNS = 1.1.1.1
SaveConfig = true
ListenPort = 51820
PrivateKey = <SERVER_PRIVATE_KEY>
PostUp = iptables -A FORWARD -i %i -j ACCEPT; iptables -t nat -A POSTROUTING -o <SERVER_INTERFACE> -j MASQUERADE
PostDown = iptables -D FORWARD -i %i -j ACCEPT; iptables -t nat -D POSTROUTING -o <SERVER_INTERFACE> -j MASQUERADE


[Peer]
PublicKey = <CLIENT_PUBLIC_KEY>
AllowedIPs = 192.168.10.5/32 # Client ip
For add peer without restart Wireguard Server
wg set wg0 peer "<CLIENT_PUBLIC_KEY>" allowed-ips <CLIENT_IP>/32Setup ip forwarding
sudo nano /etc/sysctl.confEdit this line
net.ipv4.ip_forward=1See the result
sudo sysctl -pSetup firewall
sudo ufw allow 51820/udp
sudo ufw allow 22/tcp
sudo ufw enable
sudo ip link set dev wg0 mtu 1360
Launch server
sudo wg-quick up /etc/wireguard/wg0.confClient Side (Windows)
Go on Wireguard web site and download the client Wireguard and install it.

Open it and setup new tunel
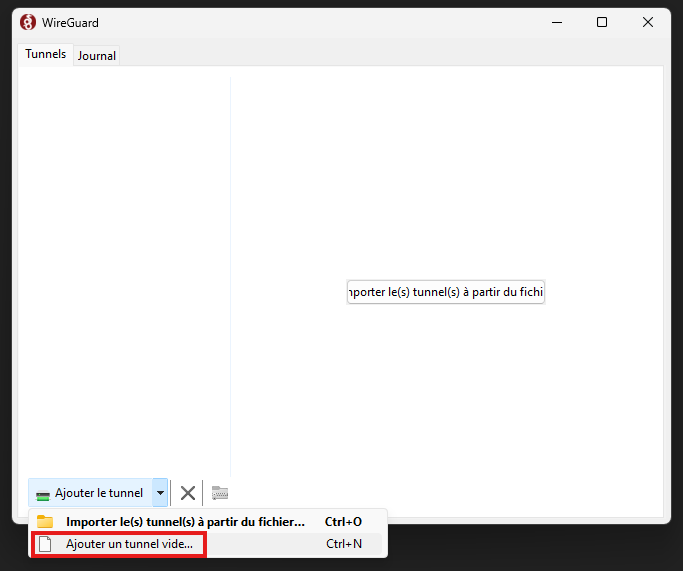
Select name of this tunnel (anything is good)
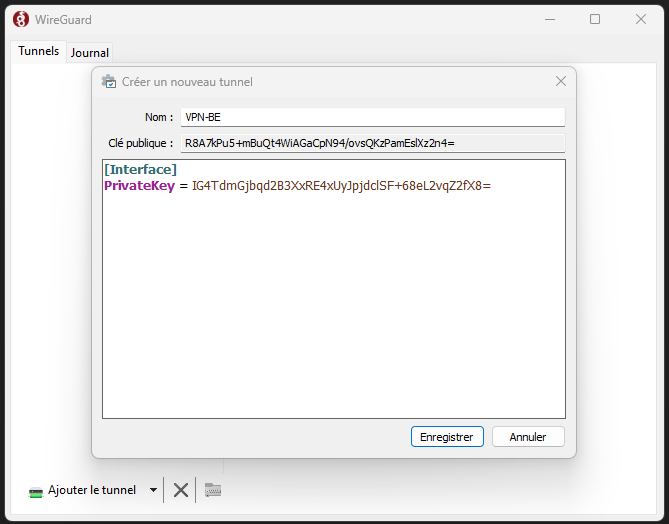
and add it inside
Address = <CLIENT_IP_ADDRESS>/24 #Client IP address
DNS = 8.8.8.8

[Peer]
PublicKey = <SERVER_PUBLIC_KEY>
AllowedIPs = 0.0.0.0/0
Endpoint = 35.195.77.67:51820 #Server's public ip
No Comments